Create EVM-Compatible Tokens
Create ERC-20 and BEP-20 compatible tokens on Ethereum, BNB Chain, Polygon, Base, and other EVM-compatible blockchains. Choose from standard tokens, advanced liquidity generator tokens, or fully customizable tokens with advanced features.
Overview
EVM (Ethereum Virtual Machine) compatible tokens follow the ERC-20 standard (or BEP-20 on BNB Chain) and can be deployed on any EVM-compatible blockchain. These tokens are widely supported by wallets and DeFi protocols, making them ideal for most cryptocurrency projects.
Supported EVM Chains
Create tokens on these EVM-compatible blockchains:
Mainnet
Ethereum
ERC-20 standard
BSC
BEP-20 standard
Polygon
ERC-20 standard
Base
ERC-20 standard
Testnet
Ethereum Sepolia
For testing
BSC Testnet
For testing
Polygon Amoy
For testing
Base Sepolia
For testing
Token Types
Choose from three types of EVM tokens:
Standard Token
A basic ERC-20/BEP-20 compatible token with standard transfer, approval, and balance functions. Perfect for most use cases.
- Standard transfer functions
- Balance tracking
- Approval mechanism
- EVM multi-chain support
Liquidity Generator
An advanced token with automatic liquidity generation, reflection rewards, and customizable fees. Perfect for tokens with automated liquidity mechanisms.
- Automatic liquidity generation
- Reflection rewards system
- Customizable tax fees
- Charity wallet support
Custom Token
A fully customizable token with advanced features including transaction limits, wallet limits, blacklist, minting, and recovery functions.
- Customizable fees (buy/sell/transfer)
- Transaction and wallet limits
- Blacklist functionality
- Optional minting and recovery
How to Create an EVM Token
- 1
Navigate to Create Token
Visit the Create Token page and select "EVM Token" as your blockchain type.
- 2
Select Token Type
Choose from Standard Token, Liquidity Generator, or Custom Token based on your project needs.
- 3
Fill Token Details
Enter your token information:
- Name: Full token name
- Symbol: Ticker symbol (3-5 characters)
- Total Supply: Maximum number of tokens
- Decimals: Typically 18 for EVM tokens
- Custom Owner Address: Optional address that will own the token contract (defaults to your wallet)
- Custom Supply Recipient: Optional address that will receive the initial token supply (defaults to your wallet)
Standard Token
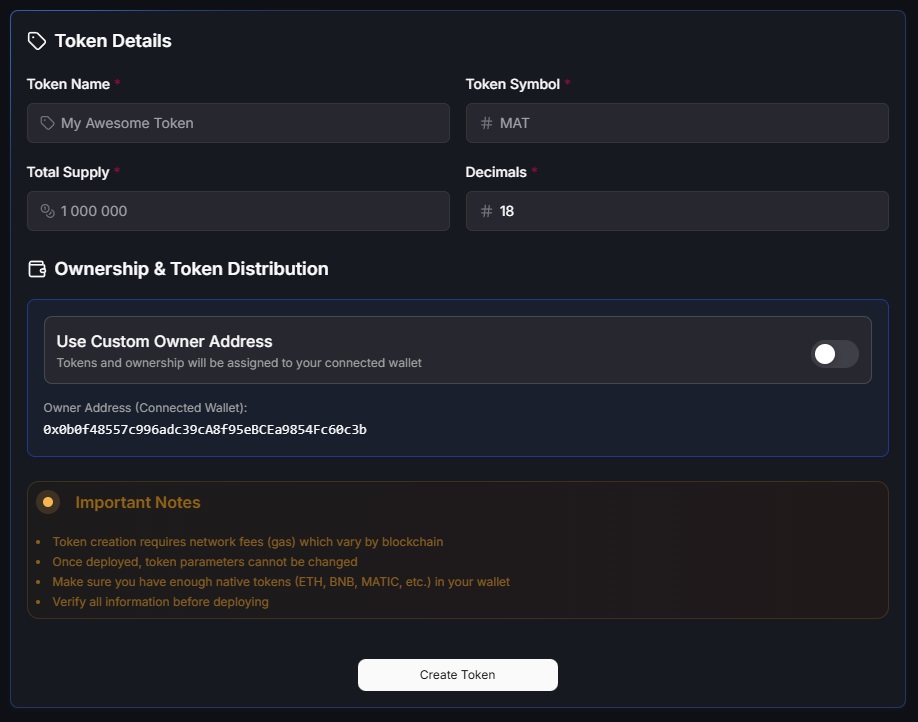
Click the image to zoom in
Liquidity Generator
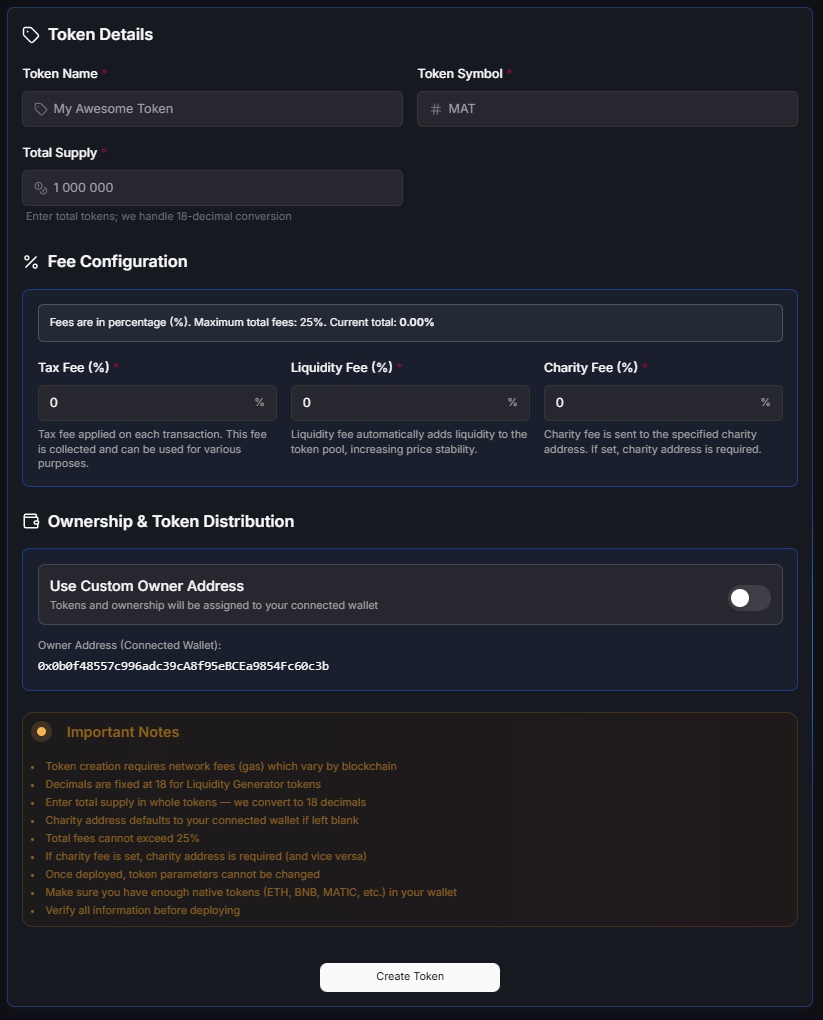
Click the image to zoom in
Custom Token
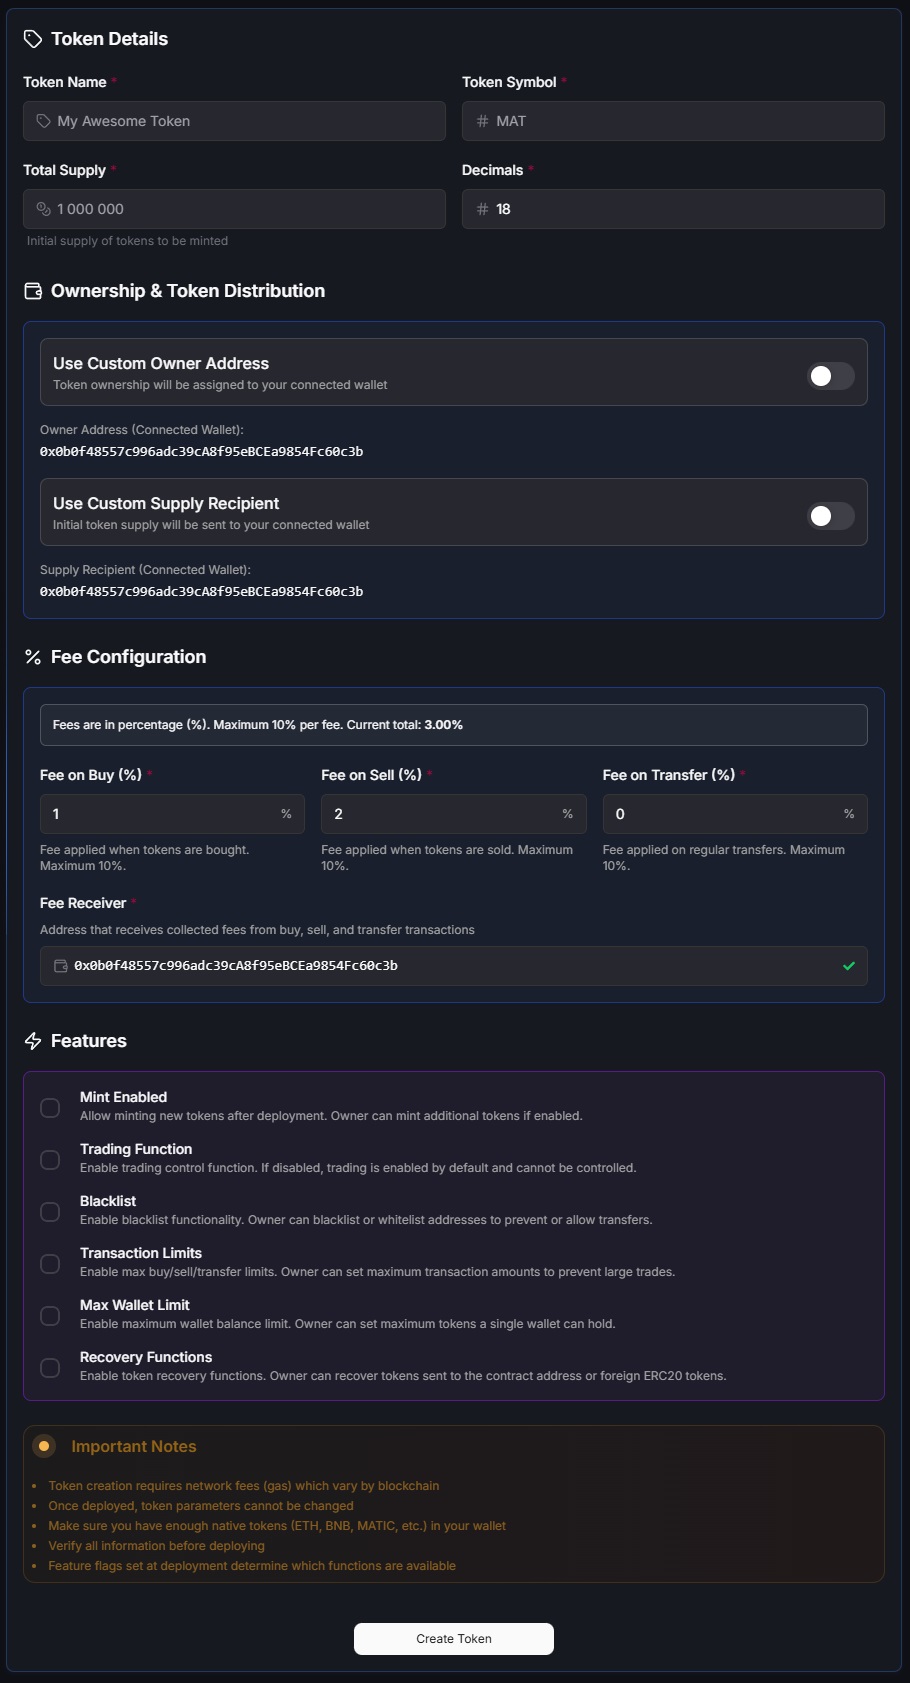
Click the image to zoom in
- 4
Select Network
Choose your EVM-compatible blockchain (Ethereum, BNB Chain, Polygon, Base) and network (mainnet or testnet).
Why Test on Testnet First?
Testing on testnet networks is highly recommended before deploying to mainnet. Testnets use free test tokens, allowing you to practice the token creation process, verify all parameters are correct, and understand the interface without spending real funds. This helps prevent costly mistakes and ensures you understand all features before committing to mainnet deployment.
Select Network
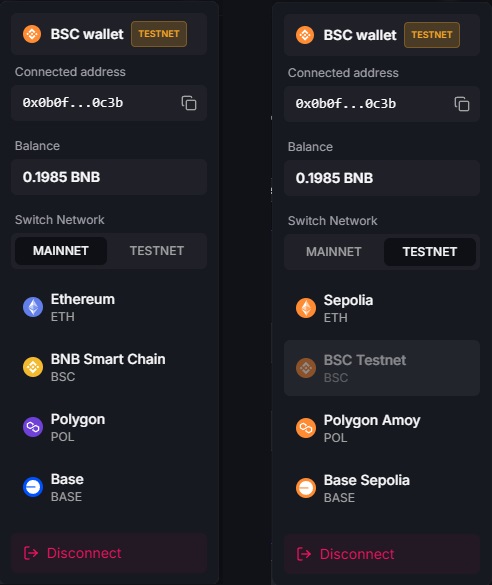
Click the image to zoom in
- 5
Configure Advanced Settings
If creating a Liquidity Generator or Custom Token, configure additional settings like fees, limits, and special features.
- 6
Review and Deploy
Review all token details and fees. Connect your wallet and approve the transaction to deploy your EVM token contract.
- 7
Verify Deployment
After deployment, you'll receive your token contract address and transaction hash. Verify on the blockchain explorer and view your token in your wallet.
Video Tutorials
Standard Token
Watch tutorial: How to create a standard EVM token
Liquidity Generator
Watch tutorial: How to create a liquidity generator EVM token
Custom Token
Watch tutorial: How to create a custom EVM token
Fees
EVM token creation fees include:
- Platform Fee: Fixed fee for token creation service
- Gas Fee: Network transaction fee (varies by chain and network congestion)
- Testnet: Usually free (test tokens)
Best Practices
Before Creating
- Test on testnet first
- Ensure you have enough native tokens (ETH, BNB, MATIC, etc.) for gas fees
- Choose appropriate token name and symbol
- Plan your total supply carefully
Security Considerations
- Keep your wallet secure and never share private keys
- Verify your token contract on blockchain explorers after deployment
- Understand the implications of custom fees and limits
- Test all token functions on testnet before mainnet deployment
Related Resources
Important Disclaimer
EVM token creation is irreversible. Once deployed, you cannot modify basic token parameters like name, symbol, total supply, or decimals. Always test on testnet first and double-check all parameters before deploying to mainnet.
Gas fees vary significantly between networks. Ethereum mainnet typically has the highest fees, while Layer 2 solutions like Polygon and Base offer lower costs. Consider your budget when choosing a network.